One of the bonuses of this job is the occasional jolly, in this case a few days in Nuremberg, arguably German’s most beautiful city. We were there to attend IWA, a massive trade event and essentially the European equivalent of the Shot Show in the States.
After a morning pounding the aisles, shaking hands and kissing babies on the trade stands, we reconvened at the press lounge for lunch. Emily Damment, our digital editor, and Sharon Sammil, head of commercial sales, and I huddled around a table and set about throwing ideas around for a video project.
As we had all the big fish in one pond, it seemed the ideal time to pitch some ideas and approach suppliers. The winner was “How far can you shoot a .22 LR?” Obviously there are many ways to skin a cat, but the essential idea was to take an off-the-shelf rifle and assorted add-ons and see how far we could push it.
For me the key factor was to ensure that this was still a usable hunting tool and not just a pimped up benchrest rifle. It would be all too easy to stick a massive MOA rail on the rifle, zero it at a ridiculous distance and claim some impressive but impractical range.
So to make it usable in the real world the decision was made to set the base zero at 50m using subsonic ammo so that the gun could still nobble rabbits quietly at typical ranges yet stretch things out as far as possible at the bench. The stage was set; all we needed to do was acquire the kit.
Guns and Ammo
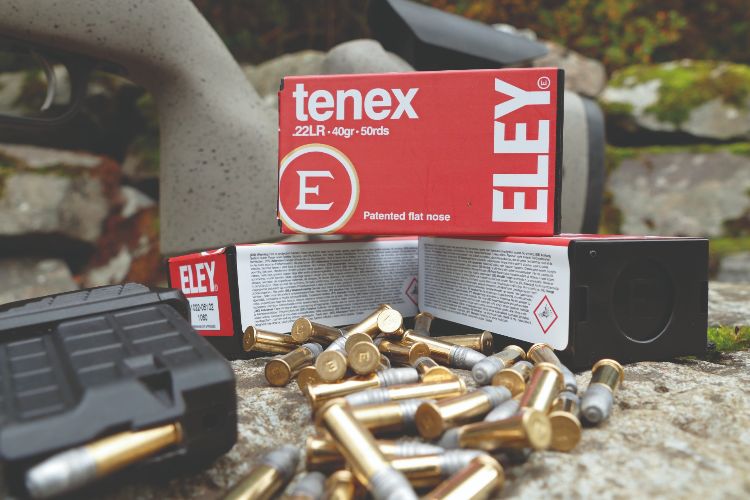
The first port of call was ammo, so it was off to the Eley stand to pitch our idea. Fortunately they loved it and the wheels were in motion. On return to the UK a date was set for a trip to the midlands to batch test their premium .22 LR competition round – the superb Tenex.
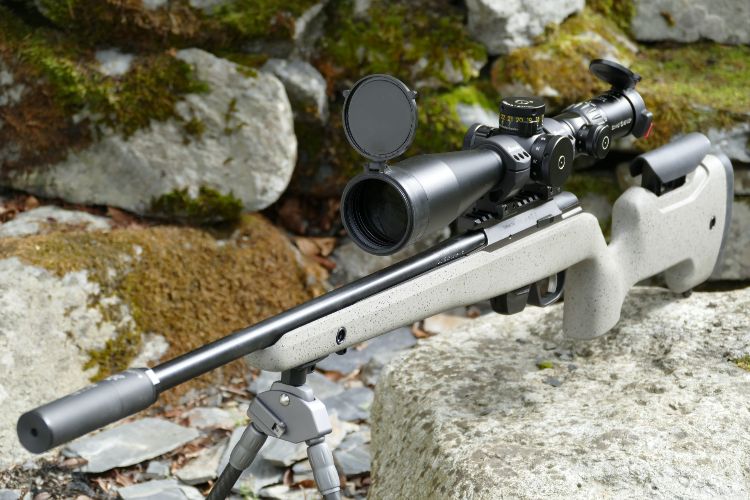
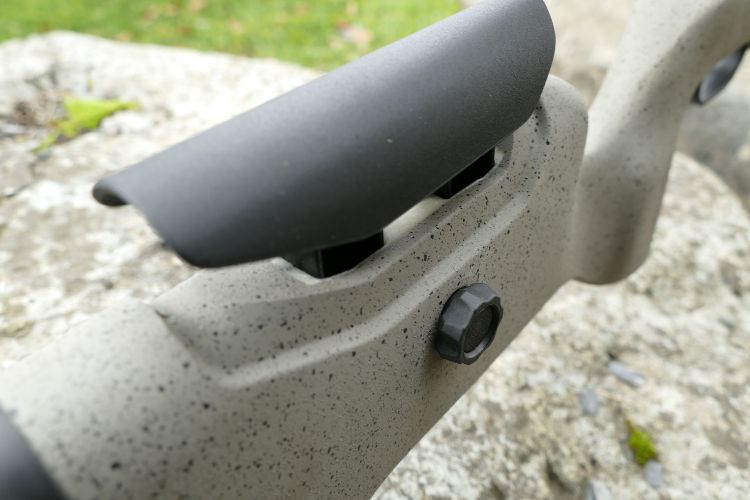
Before that we obviously needed a rifle, so we turned to GMK. I’m a big fan of the Tikka T3x range and I own one in .243 that has been a cracking foxing gun, so the T1x (its .22 LR baby brother) seemed the ideal choice. To accommodate the long-range precision vibe, the T1x UPR was the obvious choice, with its benchrest-inspired stock.
The rifle arrived along with a 0 MOA Picatinny rail – remember, the goal was to build a functional hunting rifle that also had long-range credentials. The plan was to add extra elevation via the rings rather than the rail, and again GMK came to the rescue with their Burris XTR Signature rings, which can add over 40 MOA to any scope on a standard rail.
The final piece of the puzzle was the scope. We needed a dedicated dialler for this – something that could really reach out – so we turned to Schmidt & Bender. The latest incarnation of the PMII series was the perfect candidate. It has a 34mm tube, so there’s loads of elevation thanks to the additional space the larger tube provides for the internal erector tube.
S&B offer scopes that can reach out even further than the PMII we chose, but this scope would be more than enough for our needs. The 5-25x56 PMII LP Mildot was a perfect fit for the Tikka, thanks to the full-size dimensions of the UPR.
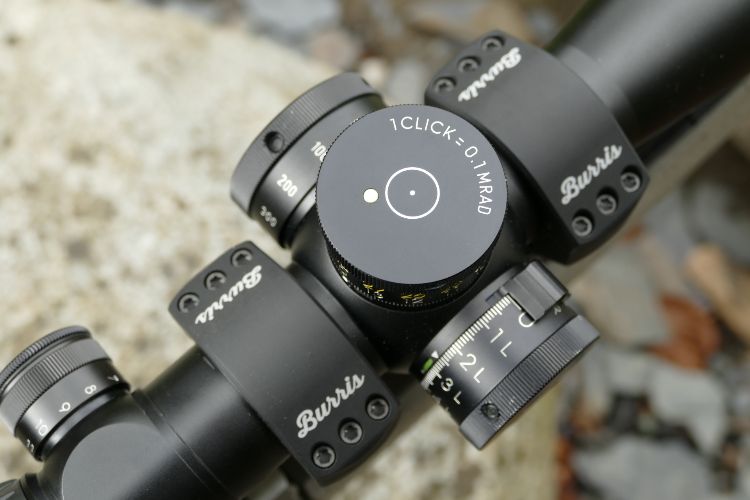
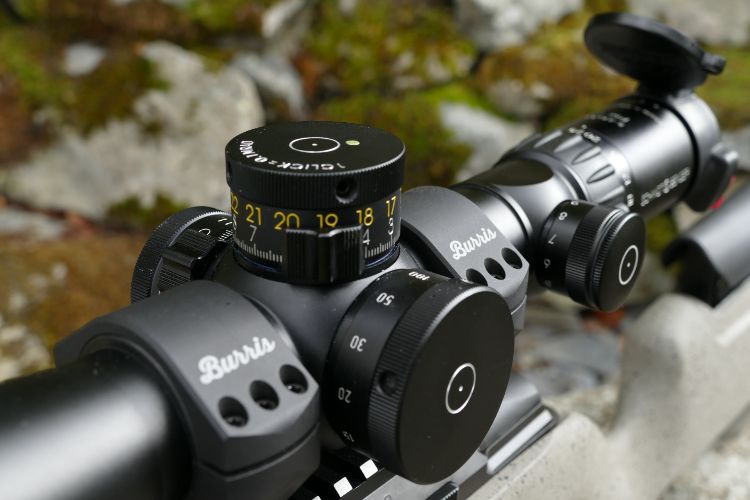
As you’d expect for the asking price, the new PMII is a spectacular scope with an excellent uncluttered, military-style P5FL reticle. It’s also an FFP scope, which I love in a dedicated dialler. The top turret is ideal for extended range, with a pop-up indicator to let you know where you are in terms of rotation.
 The setup
With all the pieces in place it was time to put them together and do the initial setup for the new rig. The first step was to set up the Burris TXR Signature rings for the scope. The amount of elevation they can add is actually higher than the 40 MOA offered by the rings as standard. You do this by placing the rings closer together – a 3.5" spacing pushes the max elevation to 54.24 MOA. I opted for a more standard distance, as the combined extra elevation provided by the rings, plus the huge elevation of the scope, was certain to outstrip the usable ballistic curve of any subsonic round.
The mounts themselves are dish shaped internally and ship with an array of half-rounded polymer inserts, forming a kind of ball and socket arrangement within the rings, This allows the scope to pivot slightly within the rings to add the necessary elevation. Once locked down they’re rock solid, but as you’ll see in the accompanying video the effect is quite dramatic regarding the pitch of the scope.
You add elevation by dropping a +20 MOA half-ring in the rear mount and a –20 MOA in the front, thereby adding an additional 40 MOA of tilt. Then you drop the scope into position, adding a -20 at the rear and a +20 at the front.
Obviously we’re mixing angular formats a little, as the PMII is a mildot scope, not MOA, but after a bit of calculation in Strelok Pro it turned out that the rings added an additional 116 clicks of elevation to the scope at 100m, which is very impressive indeed.
The next job was to dial up the scope to a high mag and get behind the gun to check the eye relief and eye box. It’s always a good idea to dial any scope to a high mag at this stage, simply to ensure you don’t have any tunnelling when you really push the magnification. Once I was happy it was just a matter of levelling the scope and tightening everything down.
Before heading to the range, the final task was to measure the scope height. This is crucial for long-range precision, as you need to provide the exact scope height above the bore to properly calculate elevation in any ballistic app. I do this by measuring from the middle of the bore to the junction point between the rings.
All measurements taken and duly noted, it was off to my 50m range to get a rough zero prior to my trip to Eley for the batch testing of the ammo. Down at the range all went well, with the rifle shooting really nice groups using an array of bog-standard subsonics, so I was optimistic.
The day soon arrived to fine tune the rig and I was off to Eley and their in-house test facility, which includes twin indoor tunnel ranges. The rifle was soon out of its stock and clamped in position in a massive gun vice on the firing line.
Alongside were racks of Tenex ammo, all carefully sorted into batches. The system was simple, methodical and – dare I say it – slightly tedious. Ten rounds were fired from each batch, with perhaps a dozen or more batches in total.
Every shot in each batch is recorded electronically, and the results analysed in Eley’s custom batch-testing software, including highly accurate average fps figures for each batch. This is another key component that is needed in the overall ballistic equation.
Once all the batches were shot the top three were selected by group size and we repeated the process with those. After analysing the final 30 shots we had our winner and I had the perfect match/batch for my barrel.
 Doing the maths
At this stage I had all the key components needed to work out the ballistics for the rifle and the accompanying Tenex ammo – the bullet weight, its velocity and the scope height above the bore. It was time to fire up Strelok Pro on my phone and punch in the numbers.
There are other components to the equation, such as twist rate, spin drift, bullet length, etc, but it’s the core elements that are crucial to working out the ballistic curve of the round and therefore the elevation required to make shots at extended range.
If I were shooting at extreme range with a larger centrefire, especially using custom loads, I might lean towards something like the Kestrel ballistic calculator, but for anything in the 400-500m range, which is what I was expecting from the rimmy, Strelok would be more than adequate.
 Off to the range
After several delays due to inclement weather the day finally arrived when I could load up the car and make the 60-mile trip to Orion. Orion offer long-range shooting and shooting tuition in a spectacular location in the heart of Wales. It’s a beautiful spot made even more attractive from a rifleman’s perspective by a host of steel targets scattered around on various hillsides.
Orion offer a pretty unique shooting experience, with long-range shooting out to a mile from predefined firing points, as well as a more traditional close-range area where you can check your zero and plink away at 50-200m.
I started the trip alone but soon met up with Emily Damment and Ollie our cameraman on the way. At a pre-assigned location we met up with the team from Orion and made our way to the range, nestled in the mountains.
After the usual pleasantries and coffee with our host, John, it was time to sign my life away on the obligatory liability waivers and present my FAC for inspection. After all the paperwork was complete we made our way to the zeroing range, where I could finally confirm my ballistic calculations and make any last-minute tweaks necessary prior to heading out on the hill.
We started off gently with a repeat of my 50m zeroing session back home, just in case the rifle had taken a few knocks on the rough dirt roads leading to the range. The rifle hadn’t moved a click and steel bunnies and crows out on the range were getting peppered repeatedly – and more important accurately.
The next step was to stretch things out to 100m. A quick Strelok calculation had me dialling an additional 20 clicks onto the PMII. Once again all was well, with the Tenex continuing to hit dead centre on a selection of steel critters, gongs and clays, all strategically placed before their dirt backstops.
At this point things got a little more challenging, with 76 clicks added to make the leap from 100m to 200m. Again it all looked good, with the odd miss that I confidently put down to a combination of occasional 20mph gusts and my own ineptitude on the trigger.
The checks and my various bits to camera complete, we could finally load the ATV and make our way to the hill. The next target presented a big jump, going from 200m on the range to 400m in the field. It was the perfect choice, as the target sat directly in front of a small tarn, or llyn in Welsh, which nestled at the foot of the adjacent valley wall.
The water below provided the perfect backstop and more importantly allowed us to spot the splashes (quite literally) from any wayward shots hitting the water. Firing up Strelok once more had me dialling in a rather daunting 225 clicks.
Much to my surprise, and indeed relief, within a few shots at the new distance we were hitting regularly, with a few left and right as you’d expect with a gusting wind. At that distance it was very difficult to gauge what the wind was doing down on the valley floor relative to what we were experiencing up on the hill. The occasional shot was going unexpectedly high, which seemed odd, but John from Orion explained that in this mountainous environment you can often experience three-dimensional wind.
Generally we only experience two-dimensional wind, essentially degrees of left to right or vice versa, but in the mountains the wind can also climb the valley walls and push rounds up, which accounted for the odd high miss.
 Finally the moment of truth came and it was time to push things out even further. The next target was a very intimidating 486m from our firing position at roughly our height on the opposing valley wall. Strelok was again called into service, with the calculation requiring a total of 301 clicks from our initial 50m zero. At this point the required elevation, not surprisingly, got the better of the combined efforts of the XTR rings and the PMII’s internal adjustment.
We could add 270 of the required 301, meaning that the missing 31clicks (3.1mrad) needed to be added via the reticle. The necessary holdover was applied, and the first round headed down range. A miss and a fairly big one. Subsequent shots confirmed that perhaps 486m was indeed a tad too far for our valiant little rimfire.
We did get a couple of hits but to be honest that was more luck than good management. The misses were wild and unpredictable and impossible to correct for, alternating high and low, left and right. It was clear that the round had become unstable and was perhaps tumbling towards the target in the latter stages of its trajectory.
The lesson from all this? Well, with off-the-shelf components and firing subsonic ammo it appears somewhere around the 400m mark is the best you can realistically expect in terms of accurate shooting from a rimfire. In my opinion that’s a very impressive result, especially considering that this rifle is essentially still a bunny gun that could be instantly dialled back to its initial zero and still bowl over Bugs at close quarters with ease.
I’d like to offer huge thanks to all the suppliers for their kit, time and trouble, and also the staff at Orion for a truly unforgettable shooting experience.
 Kit bag
Tikka T1x URP .22 LR
Supplier: GMK
Price: £1,300.00
Schmidt & Bender 5-25x56 PMII LP Mildot
Supplier: Schmidt & Bender
Price: £3,735.00
Eley Tenex .22 LR ammunition
Supplier: Eley
Price: £15.30 per box of 50
Burris XTR Signature rings (34mm)
Supplier: GMK
Price: £70.00